Minimum System requirements.
P-III 500 MHz Intel
processor
128 MB RAM
16 MB Graphics card with
OpenGL Support
100 MB free Hard Disk
Space
SVGA Monitor set to 24
bit color and resolution 800 x 600.
JDK 1.3.1 runtime environment
with Java3D 1.2.1 support (OpenGL).
Windows 95, 98 or NT 4.0
|
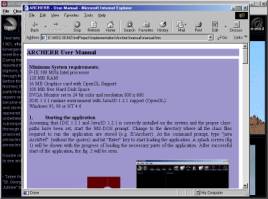
1. Starting
the application
Assuming that JDK 1.3.1 and Java3D 1.2.1 is correctly installed on
the system and the proper class-paths have been set, start the MS-DOS
prompt. Change to the directory where all the class files required to run
the application are stored (e.g. E:\Archerr). At the command prompt, type
“java ArchRef” (without the quotes) and hit “Enter” key to start loading
the application. A splash screen (figure 1) will be shown with the progress
of loading the necessary parts of the application. After successful start
of the application, the figure 2 will be seen.
|
|

|
|
|
Figure 1: Splash screen
|
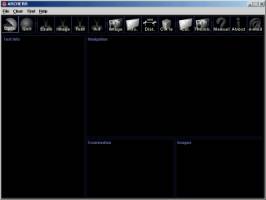
Figure 2: Application
window after successful start
|
2. Explaining
the first screen (Top)
Figure. 2 shows the initial screen
shot when the application is started. The application window is divided
into seven areas as shown in figure 3.
Area 1: Title Bar shows
the Application Icon and the Application Name (ARCHERR).
Area 2: Menu Bar gives
access (with standard keyboard shortcuts) to various features of the
application.
Area 3: Tool Bar gives
alternative access to various features of the application along with
additional toggle actions.
Area 4: Text viewport
shows the relevant information as the user navigates or double clicks to
find more information (See Nos. 6, 7, 14 for details).
Area 5: Navigation
viewport allows the user to navigate in the virtual environment of the
opened heritage site using the keyboard(See Nos. 4, 5, 11 for details).
Area 6: Examination
viewport allows the user to examine selected objects (from the Navigation
viewport) by rotating, translating and zooming into the object using the
mouse (See Nos. 10 for details).
Area 7: Image viewport
shows the relevant real world pictures while navigating or when double
clicked on a particular object in the Navigation viewport or the
examination viewport (See Nos. 9, 15 for details).
|
|
Area 1: Title Bar
|
|
Area 2: Menu Bar
(Use mouse or keyboard
short cuts to select)
|
|
Area 3: Tool Bar
(Use mouse to select
or switch the toggles)
|
|
Area 4: Text Viewport
(Use mouse to double
click and open a new or another text window)
|
Area 5: Navigation
Viewport
(Use keyboard to
navigate,
Use mouse to identify
clickable objects,
Use mouse to double click
on various objects, to see detailed object in examination viewport, more
information in text and images viewport,
Use mouse to find
distance.)
|
|
Area 6: Examination
Viewport
(Use mouse to rotate,
zoom, and translate to examine the object, and double click to see more
information in text and images viewport.)
|
Area 7: Image Viewport
(Use mouse to double
click and open a new or another window with bigger image)
|
|
|
Figure 3: Seven areas of
the application
|
3. Opening
a data file for reference (currently one file exists – St. George’s
Church): (Top)
|

|
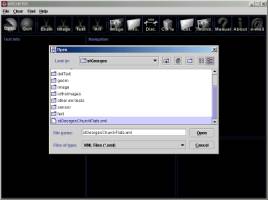
To open a data file,
point the mouse to the icon in the tool bar (Area 3), which says “Open”.
As the mouse moves over the icon it turns green in colour (as seen in the
adjacent figure). Click to open a standard file choosing facility.
Navigate to the appropriate directory (e.g. E:\Archerr\stGeorges), select
the file named “stGeorgesChurchFlats.xml” and click on “open” button
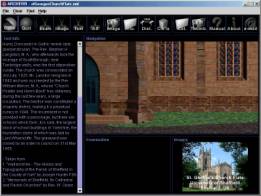
(figure 4). The application will first show the filename in the Title bar
and show the progress of loading each object in the database. After a
successful load of the file, figure 5. should be seen.
|
|
|
|
|
Figure 4:
Opening a file
|
Figure 5:
After opening a file
|
|
|
|
|
4. Navigating
in the Navigation viewport (using keyboard): (Top)
To navigate in the
virtual environment a keyboard interface has been provided. The following
table gives a list of all possible ways to navigate:
Key
|
Movement
|
Alt-key movement
|
|
Left arrow key Ü
|
Rotate left
|
Pan left (move left)
|
|
Right arrow key Þ
|
Rotate right
|
Pan right (move right)
|
|
Up arrow key Ý
|
Move forward
|
|
|
Down arrow key ß
|
Move backward
|
|
|
Page up
|
Rotate up
|
Pan up (move up)
|
|
Page down
|
Rotate down
|
Pan down (move down)
|
|
=
|
Return to starting
position
|
|
* using the “Shift” key
in addition, accelerates all the above movements.
|
5. Identifying
clickable objects of the structure (using the mouse): (Top)
|


|
This facility is
provided to identify all objects in the navigation viewport that can be double
clicked for referring to more information. To start identifying the
objects:
1.
Move your mouse over the icon “Clk’le” in the
toolbar. This greyscale icon will change to pink colour to notify that
your mouse pointer is over this tool (see first adjacent image).
2.
Click on it once and the icon will change to
green colour (see second adjacent image) indicating that the facility is
switched on.
|
|
|
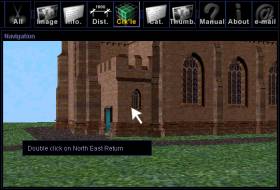
3.
Click once in the navigation viewport to activate
this viewport and then move your mouse over various objects (no mouse
button should be pressed). A small black window will popup and stay for a
few seconds showing the name of the object that has been identified (see
figure 6)
4.
To switch off this facility, click on the
“Clk’le” icon once more. The colour should change back to pink (and then
grayscale when the mouse is not over it anymore).
Note. It is possible
to navigate in the navigation viewport using the keyboard while this
facility is switched on
|
|
Figure 6:
Identifying objects
|
|
|
|
|
6. Finding
text based historical information on various parts of the structure: (Top)
|
|
There are two ways to find
text based historical information on a particular part of the structure
under consideration (It is recommended to identify the objects that are
clickable using the above-mentioned procedure (no. 5), to increase the
familiarity of the environment).
First Method:
1.
Navigate to the area, which you are interested
in.
2.
Double click on the object you are interested
in getting more information.
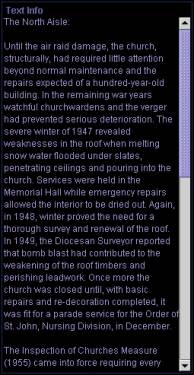
3.
The text viewport (figure 7), image viewport
and the examination viewport will be updated with associated information on
the identified object.
4.
The text viewport displays the historical
context of the object.
5.
To find historical information on other
objects, repeat steps 1 and 2 and the viewports will be updated.
|
|
Figure 7:
Text Viewport Showing Historical Information
|
|


|
Second method:
1.
Move your mouse over the icon labelled “Info.”
In the toolbar. The grayscale icon will change to pink colour (first
adjacent image).
2.
Click once on the icon to switch on the automatic
text retrieval facility. The icon will change to green colour (second
adjacent image).
3.
Now click once on the navigation viewport to
activate and navigate using the keyboard.
4.
As your view approaches any particular object,
the text viewport is automatically updated with the relevant historical
information.
5.
To switch off this facility click on the green
“Info.” icon once. The icon will turn back to pink colour and then to
grayscale when the mouse is no longer over the icon.
|
Note: It is still
possible to double click on any of the object in the navigation viewport to
view relevant information in the text and the examination viewports. Images
viewport is not updated if double clicked. The toggle button is not
available in the menu bar.
|
7. Finding
text based architectural information on various parts of the structure: (Top)
- Follow the steps mentioned in the first
method for No.6 “Finding Historical text based information”. The
examination panel will be updated with a detailed version of the
double clicked object.
- Click once in the examination viewport to
activate it.
- Now double click over any part of the
detail object. The image viewport and the text viewport will be
updated with associated information. The text viewport displays the
architectural description of the selected object while the images
viewport displays the close-up image.
|
|


|
8. Finding
image-based information on various parts of the structure:
Both the procedures
for finding image-based information are exactly similar to finding historical
text based information (No.6). For the second method use the adjacent
icons for automatic display of associated images while navigating (figure
Note: The toggle
button is not available in the menu bar.
|
|
9. Finding
image based (close-up details) information on various parts of the
structure:
See No.7 and figure 9.
|
|
|
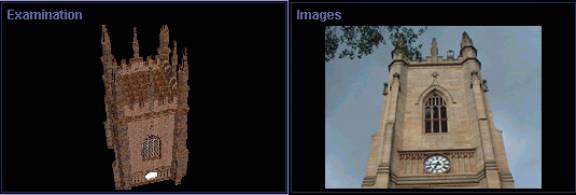
Figure 8:
ExaminationViewport
|
Figure 9:
Images Viewport
|
|
10. Examining
various parts of the structure in complete detail, individually (using
mouse): (Top)
After getting the
detailed object in the examination viewport (as described in No.6 first
method), you can examine this object by rotating, zooming or moving the
object using the mouse (figure 8).
- To rotate the object, drag the mouse using
the left mouse button.
- To zoom into the object, drag the mouse
downwards using the middle mouse button. If the middle mouse button is
not present, then use the “alt” key with the left mouse button in
conjunction. To zoom out, drag the mouse upwards using the middle
mouse button.
- To move the object, drag the mouse using
the right mouse button.
Note: The first mouse
press should be inside the examination viewport. If the mouse goes outside
the viewport during the drag, the rotation will continue although the
viewport may lose focus.
|
11. Finding
distance between two points:
|


|
1.
Move your mouse over the icon labelled “Dist.”
In the toolbar. The grayscale icon will change to pink colour (first
adjacent image).
2.
Click on it once. The icon will change to green
in colour. This indicates that the distance finding facility is switched
on.
3.
Click once in the Navigation viewport to
activate it.
4.
Select the first point by clicking once in the
navigation viewport. If the point is not exactly over a vertex (i.e. corner
point), the nearest vertex will be selected and a red box will demarcate
this corner point.
5.
Similarly, select the second point.
|
|
|
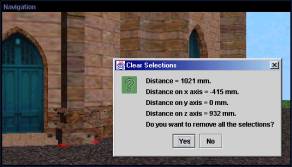
6.
Immediately after the second point is
selected, the actual distance in millimeters and distances on each axes
will be displayed in a dialog box (figure 10).
7.
If the dialog box obstructs the selection
points, it can be moved before answering the question.
8.
Finally, the dialog box asks whether you would
like to retain the selected points for further reference or remove them.
9.
Clicking on “yes” will remove the two red
boxes.
|
|
Figure 10:
Distance found!!
|
|
|
|
10. To turn off
the distance finding facility, click on the “Dist.” once again. The icon will
turn back to pink colour and then to grayscale when the mouse is not over
it anymore.
Note: It is still
possible to navigate using the keyboard as long as the mouse is not clicked
outside the navigation viewport. You cannot use double clicking to find text
information or image information or get detailed object in the examination
viewport while the distance finding facility is switched on.
|
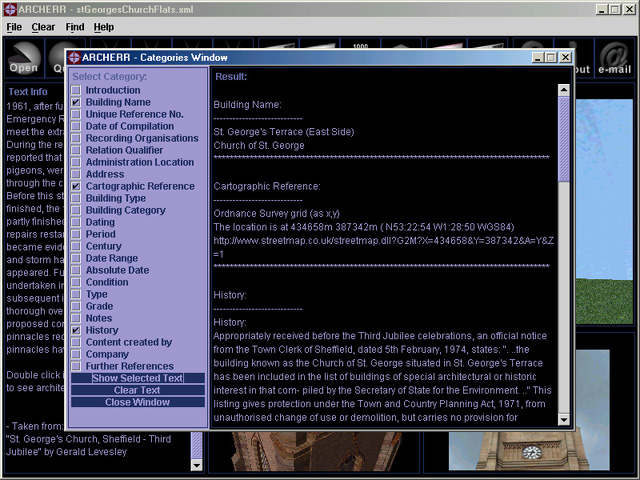
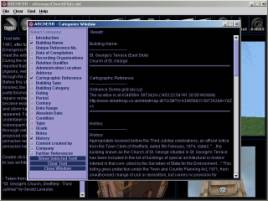
12. Finding
categorized text information on the structure: (Top)
|

|
- Move your mouse over the icon labelled “Cat.”
In the toolbar. The grayscale icon will change to pink colour
(adjacent image).
- Click on it once. A new window will open
up showing all the categories of un-referenced text (figure 11).
- Check the boxes to select the required
text to view.
- Click on the “Show Selected Text” button
to display the text in the result window.
- Check or uncheck the boxes as required
and click on the “Show Selected Text” again to show a different
selection. Note that the earlier result will be cleared and replaced
by the current result.
- You can clear the result window by
clicking on “Clear Text” button.
- Click on the “Close Window” button or the
“X” mark of the Category window to close this window.
|
|
|
|
|
Figure 11:
Categorised text
|
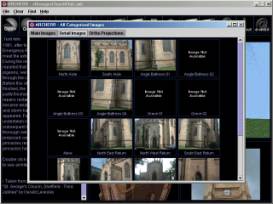
Figure 12:
Thumbnail images
|
|
|
|
|
13. Viewing
all images using thumbnail: (Top)
|

|
1.
Move your mouse over the icon labelled “Thumb.”
in the toolbar. The grayscale icon will change to pink colour (see
adjacent image).
2.
Click on it once.
3.
The application will show the progress of
creating thumbnail images of all the images in the opened database.
4.
After gathering all the images a new window
will open displaying the thumbnail images in three different categories
(Figure 12): Main Images (as retrieved individually in process No.6),
Detailed Images (as retrieved individually in process No.9) and Orthographic
Images (this is the only method to view orthographic images).
5.
Clicking on the tabs will switch between these
categories.
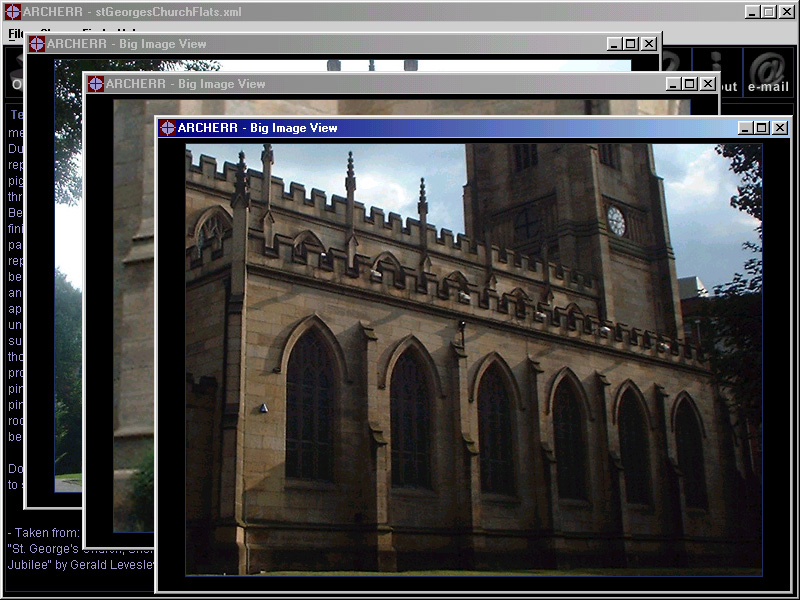
6.
Clicking once on any of the thumbnail image
will open a new window displaying the bigger image.
7.
Multiple Big image windows can be opened.
|
|
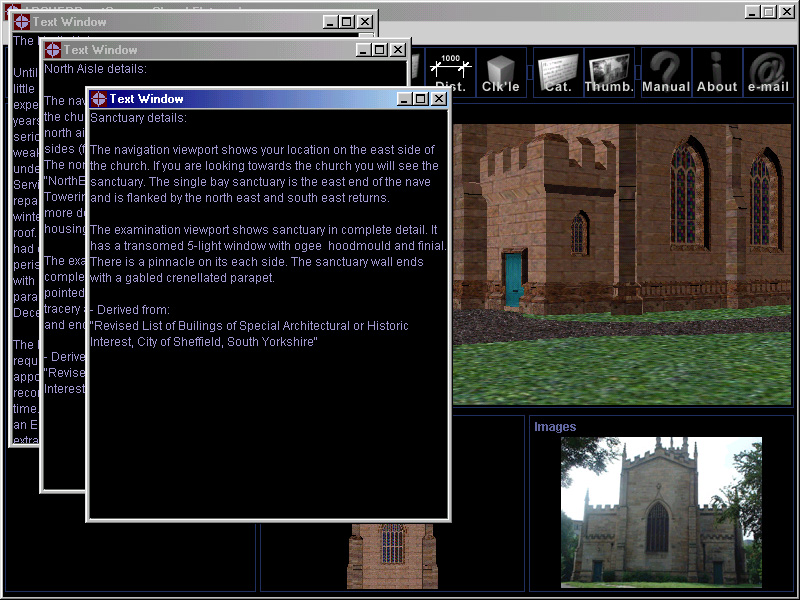
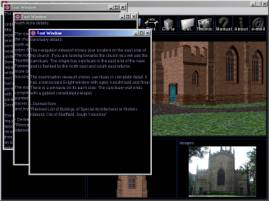
14. Referring
to (or comparing) multiple text information: (Top)
To refer to and compare
between text on various parts of the structure
1.
Either use No.6 first or second method to get
the required text in the text viewport.
2.
Activate the text viewport by clicking once in
the text viewport.
3.
Now double click anywhere in the text viewport.
A new text window will open displaying the text in the text viewport. This
window can be resized and moved to any place on the screen.
4.
Now click on the title bar of the main
application window and follow steps 1, 2 and 3 leaving the already opened
text window as it is.
5.
A new text window will open up showing the
current text in the text viewport.
6.
Similarly you can open up any number of text
windows and refer to the different texts with reference to the views in the
navigation, the examination and the images viewports (figure 13).
|
|
|
|
Figure 13:
Multple Text Windows
|
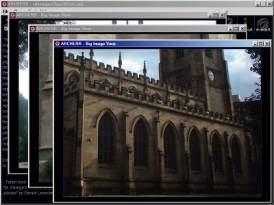
Figure 14:
Multiple Big Image Windows
|
|
15. Refering
to (or comparing) multiple image information: (Top)
To refer to and compare
between images on various parts of the structure a method similar to that described
in No. 14 “Referring to (or comparing) multiple text information” is to be
followed replacing the text viewport by images viewport (figure 14). Note
that resizing the big image windows will not resize the image. Also note
that text and images windows can be opened together to allow reference
between the text and the images.
|
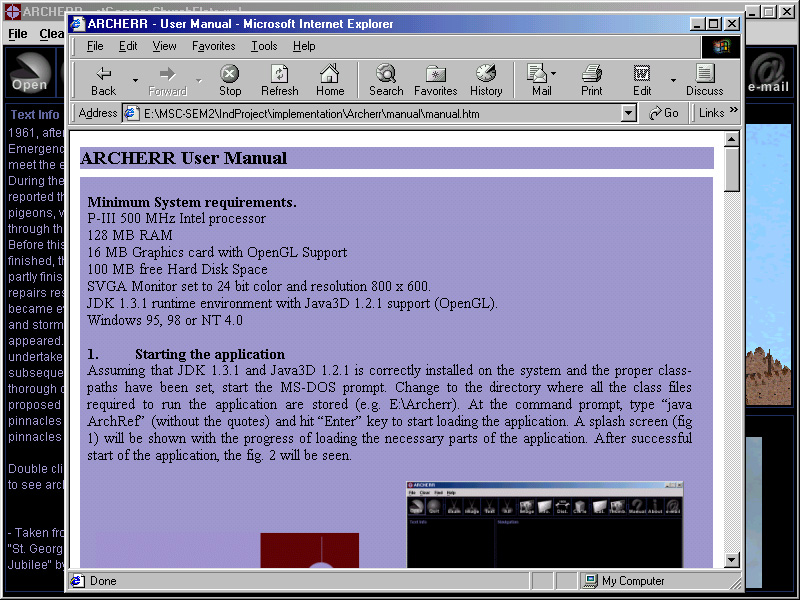
16. Refering
to user manual:
|

|
1.
Move your mouse over the icon labelled
“Manual”. The grayscale icon will turn blue in colour when the mouse is over
this icon (see adjacent figure).
2.
Click on it once.
3.
The default browser will open to show the html
version of this manual (figure 15).
4.
Browse the pages as you would do any website.
|
|
|
|
|
Figure 15:
User Manual
|
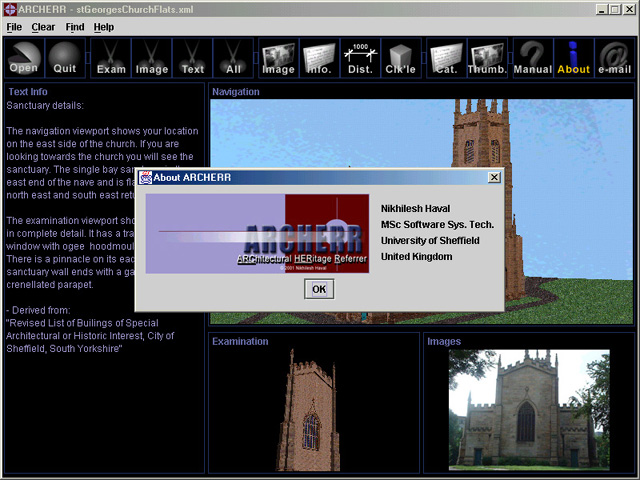
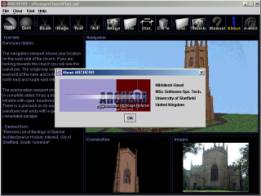
Figure 16:
About dialog box
|
|
|
|
|
17. Finding
information about the application and any links: (Top)
|

|
1.
Move your mouse over the icon labelled “About”.
The grayscale icon will turn blue in colour when the mouse is over this
icon (see adjacent figure).
2.
Click on it once.
3.
A dialog box will popup showing information
about the application.
4.
Click on “OK” to close the dialog box (figure
16).
|
|
18. Contacting
the creator of the application:
|

|
1.
Move your mouse over the icon labelled
“e-mail”. The grayscale icon will turn blue in colour when the mouse is
over this icon (see adjacent figure).
2.
Click on it once.
3.
The default mailer program will open with the
creator’s contact address filled in.
|
|
19. Clearing
viewports (Examination, Text, Image or All three together):
|
20. Quitting
the application:
|

|
- Move your mouse over the icon labelled “Quit”.
The grayscale icon will turn red in colour when the mouse is over
this icon (see adjacent figure).
- Click on it once. You will get a
confirmation dialog.
- Click on “Yes” to close down the
application.
Note: You can also
shut down the application by clicking on X on the upper right corner but
there will be no confirmation dialog.
|
|